Reference Images
We explain how to upload and scale reference images such as satellite imagery or a drone orthophoto.
Uploading Reference Images
This section explains how to upload your reference image.
EXAMPLE
Your reference image can be, for example, a satellite image or a drone orthophoto. You can learn more about how to use a drone in our Drone Mapping article.
- Create a new project or open an existing one.
- Go to the References overlay.
- Select the Upload Reference Image tool from the Tools menu.
- In the right sidebar, click the Select Image to Upload button.
- Select an image from your computer and confirm the dialog.
- The image will upload to the middle of your canvas.
Next, continue by scaling the image so you can draw your design using real-world dimensions.
Scaling Reference Images
After uploading a reference image, the image must be scaled so you can work with real-world dimensions.
TIP
Uploading your drone orthophoto in GeoTIFF format saves you the effort of manual scaling. Permiehub automatically scales and positions the image for you, allowing you to start designing immediately. See Drone Mapping for details.
- Go to your project.
- Go to the References overlay.
- Select the Select and Transform tool from the Tools menu.
- Select the reference image to be calibrated.
- Move the two calibration points to two locations between which you know the real distance, such as two corners of a building’s roof outline.
- In the right sidebar, in the Reference Image Calibration panel, click the pencil icon next to the Distance in Reality.
- Enter the real-world dimensions and confirm by pressing the Apply button.
The image now accurately represents real-world scale.
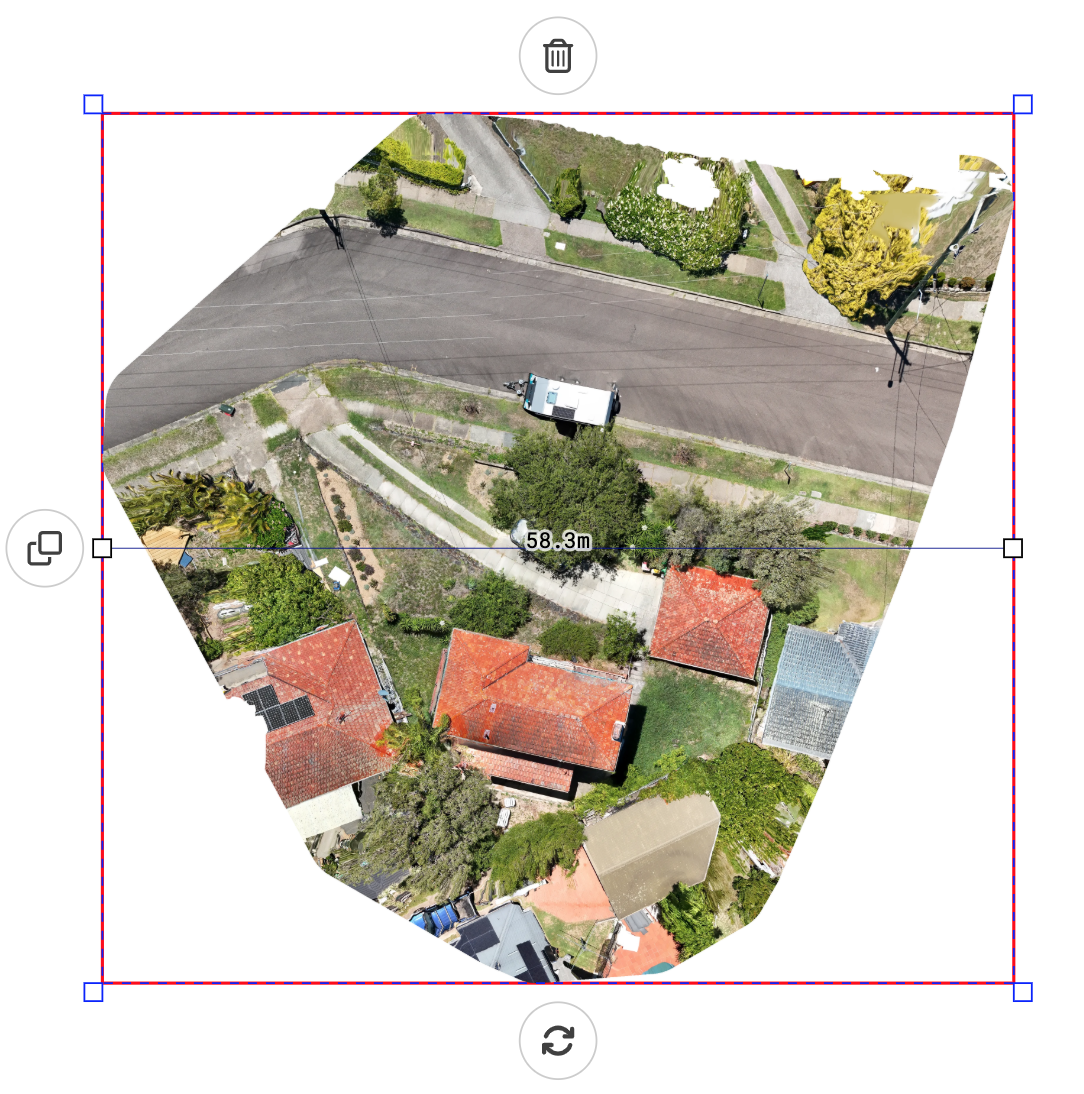
Image 1: The reference image is selected with calibration points at their default locations (centered on the left and right edges).
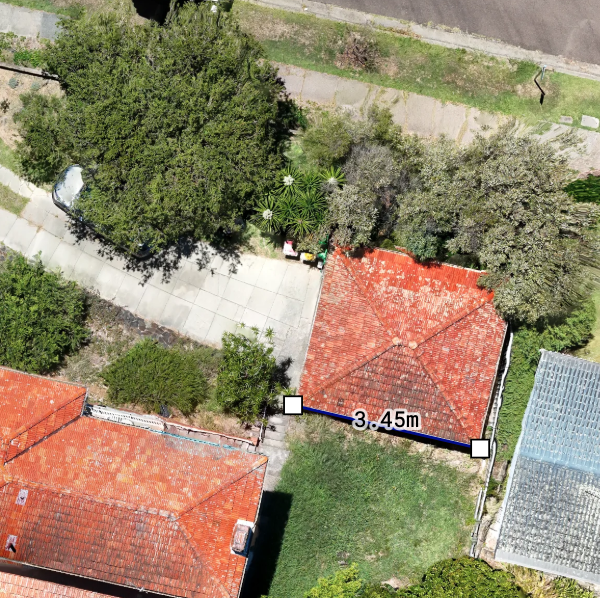
Image 2: Calibration points are moved to the target positions.
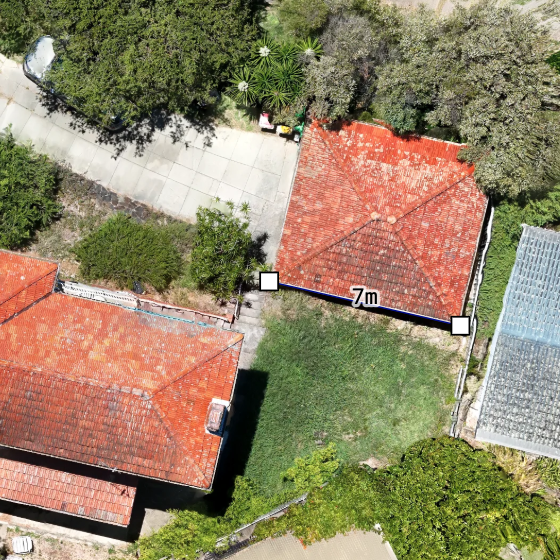
Image 3: Real-world dimensions are applied, and the image is scaled accurately.
TIP
If your image is not north-aligned, select it and rotate it by dragging the rotate icon under the image.
Organising Reference Images
When the References overlay is active, the right Sidebar shows the Objects List panel.
It helps you stay organised when you have multiple reference images and allows you to quickly select the images, hide/show them (eye icon), or, make them partially transparent (square/dotted square icon).
We recommend setting Name for the reference images to easily distinguish them.
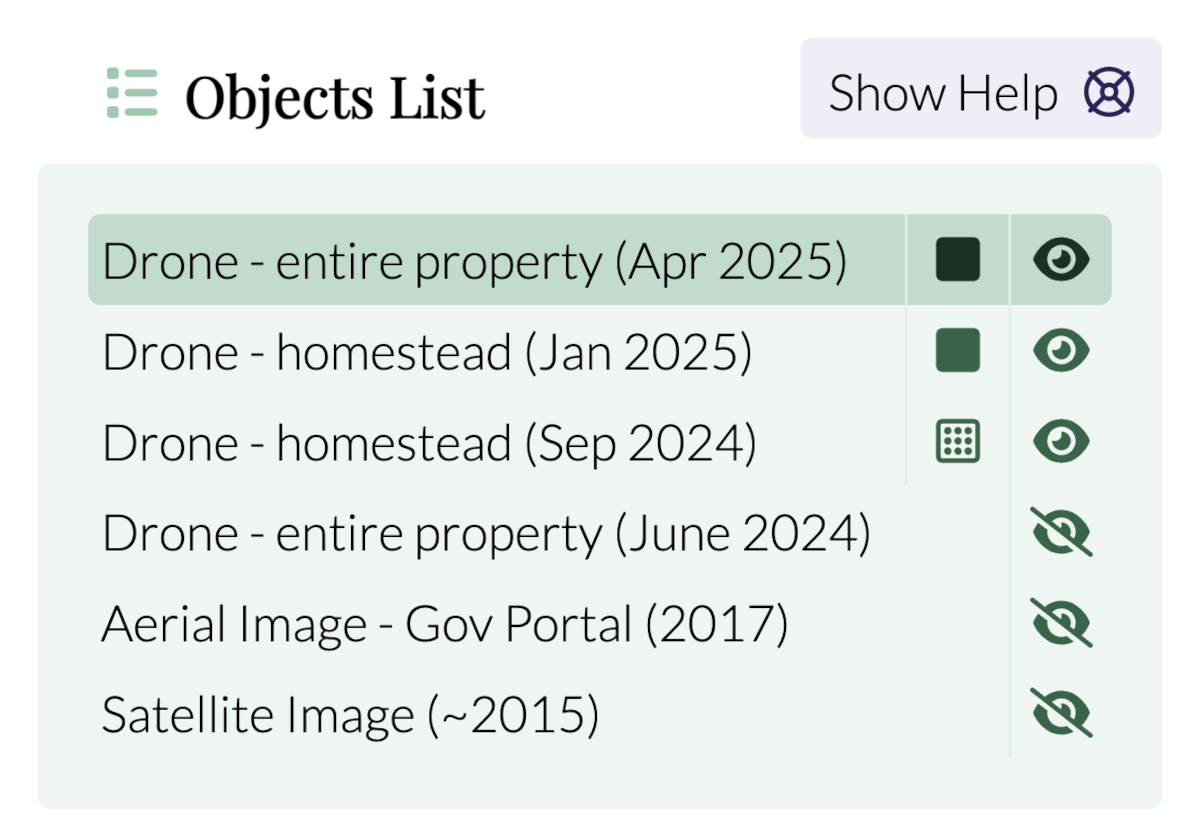
Above: Permiehub's Object List