Drawing Sun Path
Master the Sun Tool to analyse solar patterns across your property for seasonal shade and light planning. Access detailed instructions on entering latitude, longitude, and timezones, adjusting dates and times, and evaluating summer versus winter sun paths to optimise shelter and crop placement.
Drawing Sun Path Using Sun Tool in Permiehub
Observing the sun’s path is essential for site design, especially when planning for summer shade and winter light.
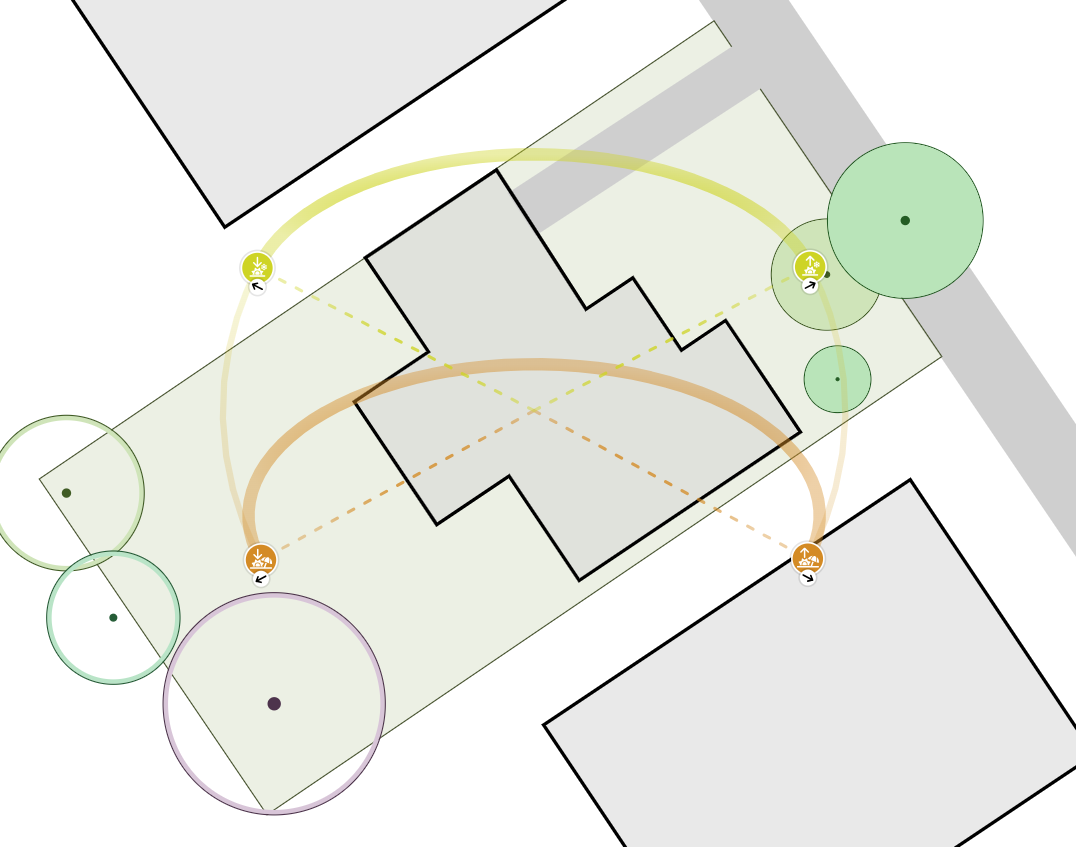


Our Goal
The following guide helps you use the Sun Tool in the Site Analysis overlay. It covers how to place the tool on your design, adjust its size, display specific times and months, duplicate it, and modify its settings.
Working with Permaculture Site Analysis Sun Tool
The Sun Tool helps you evaluate how sunlight and shadows move across your landscape throughout the year. It provides vital information when placing energy-efficient buildings, locating solar panels, or positioning plants according to their light needs. Sunlight direction and solar angles always align with the central intersection of the tool, ensuring accurate analysis wherever you place it. You might want to place a Sun Tool to show the direction of sun rays on areas such as:
- main building for passive solar gains and dynamic summer shading,
- outdoor seating,
- deciduous tree plantings,
- pergolas and gazebos.
Alternative Tools
While area markers allow you to highlight static zones of full sun or deep shade, the Sun Tool visualises dynamic solar movement. Using both tools together provides a comprehensive view of how solar energy interacts with specific features on your land.
Example of Using Sun Tool and Sun Exposure Markers
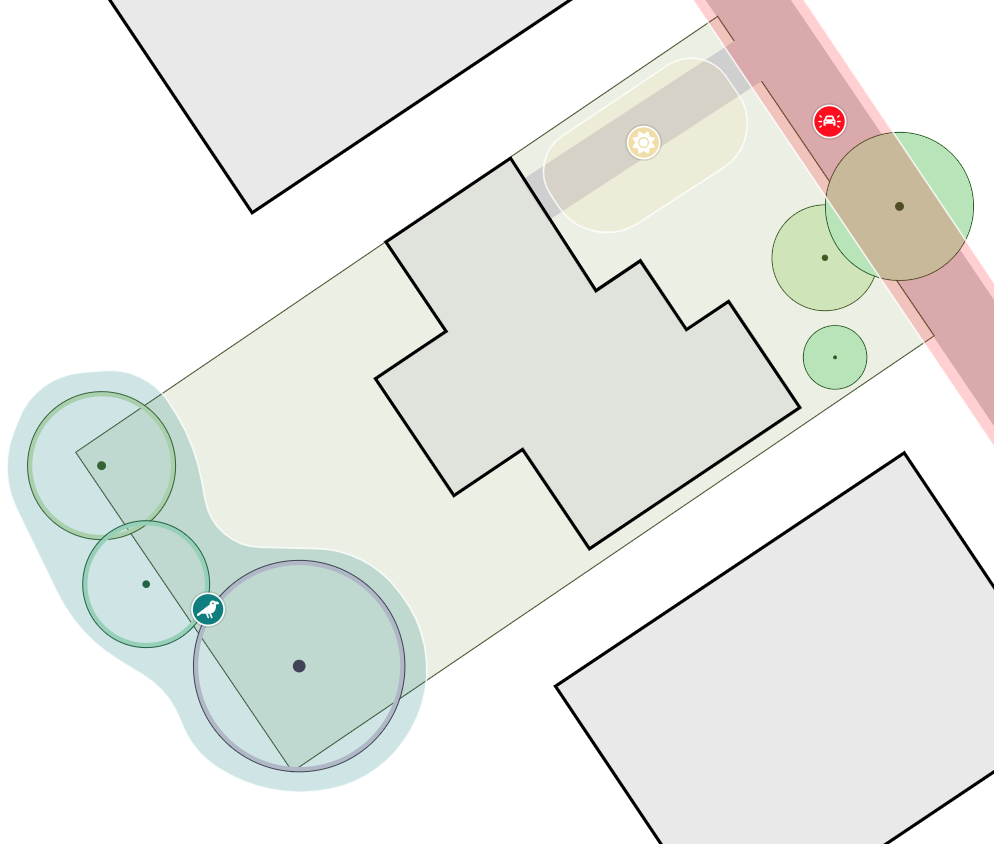
In the illustrations below, the Sun Tool object shows the sun path relative to the central point, alongside drawn markers indicating a sunny spot in the front yard. One serves as a guide for observing solar movement, while the other marks the result we deduced.
Starting Point
To use the Sun Tool in the Site Analysis overlay, open your editable project canvas. Having a general idea of your site location and orientation will help you evaluate solar observations during the design process. The toolbox provides quick access to the Sun Tool alongside other site analysis tools.
Step 1: Select & Position Sun Tool
A Sun Tool object may already be present on your canvas if you used the Base Map Wizard to set up your project.
Change Sun Tool Position
When the Base Map Wizard imports available data, it adds one Sun Tool object to your project based on the provided location. For privacy reasons, exact coordinates are never stored, and the tool uses an approximate position by rounding latitude and longitude. If the Sun Tool object is hidden below other elements, follow these steps to bring it forward:
- Select the Sun Tool object.
- Click Raise to Top in the top menu.
Move Sun Tool to Interest Points
Positioning the Sun Tool object over key structures, gardens, or outdoor living spaces allows you to check local shading. To explore solar paths across different spots of your property, you can create additional Sun Tool objects across your drawing and set their individual locations, or duplicate an existing Sun Tool object to save time.
- Click or tap your Sun Tool object to select it.
- Hold and drag to position the central intersection over the area where you wish to investigate sun movement.
Step 2: Adjust Sun Tool Settings
Fine-tuning the attributes of the Sun Tool object ensures accurate solar angles and allows you to view sun paths for specific times of year.
Set Sun Tool Approximate Location Using Search by Town
You can set the location of the Sun Tool object by searching for a nearby town or city in the properties panel. Selecting a town automatically updates the approximate latitude, longitude, and timezone settings.
- Click or tap your Sun Tool object.
- In its attributes, click the Search by Town button.
- Select the town and confirm by clicking the Save button.
The location will be rounded to the closest latitude and longitude for privacy reasons.
TIP
If your search by town fails to retrieve your desired result, try using a larger town nearby. You can also enter the latitude and longitude values manually using the corresponding attributes and setting the Timezone attribute to match.
Set Sun Tool Approximate Location Manually
If you prefer to enter coordinates directly, open the properties panel and type the approximate latitude and longitude. Adjusting the timezone ensures the solar angles match local time.
- Click or tap your Sun Tool object.
- In its attributes, change the following three values to match your location and timezone:
- Latitude to determine the northern or southern hemisphere, using a minus prefix for southern latitudes,
- Longitude to define the horizontal position,
- Timezone to align solar angles with local time.
Important
Make sure the Timezone attribute matches the Latitude and Longitude values to show the correct times for the location.
Resize Sun Tool
The dimensions of the Sun Tool object represent its visual size on your drawing, controlled directly by the width and height of the object rather than a numerical property attribute. Adjusting the visual size does not change functionality, because sunlight angles always relate to the central intersection point. You can resize the Sun Tool object while preserving its aspect ratio by dragging its outer corners.
- Select the Sun Tool object on your drawing canvas.
- Drag a corner handle inward or outward to resize.
Show Sun Tool Month
By default, the Sun Tool object displays the winter and summer solstices, as these represent the extreme paths of the sun and define the outer boundary of solar angles throughout the year. Enabling the month toggle in the properties panel allows you to project the sun’s trajectory for any selected month.
- Click or tap your Sun Tool object to select it.
- In its attributes, find Month and change its value.
- Click the Show button next to the Month attribute to display the sun path for your selected month.
Example of Showing Sun Path in Specific Month
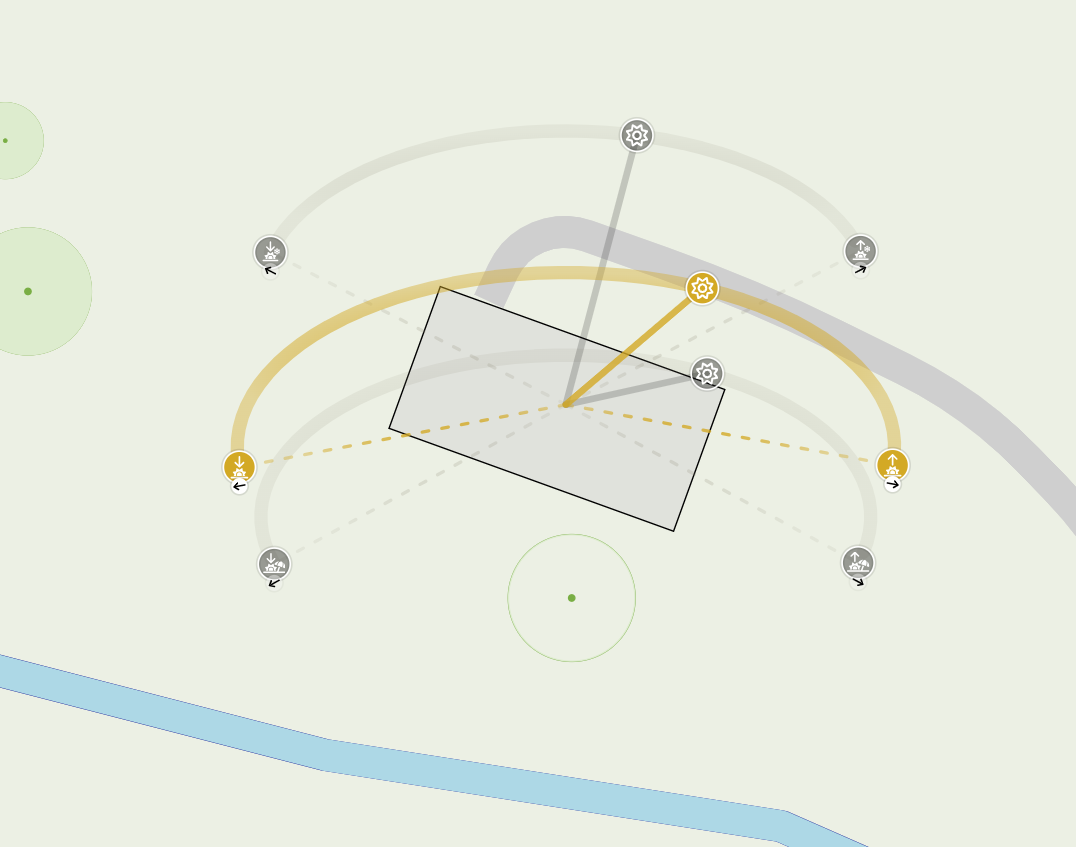
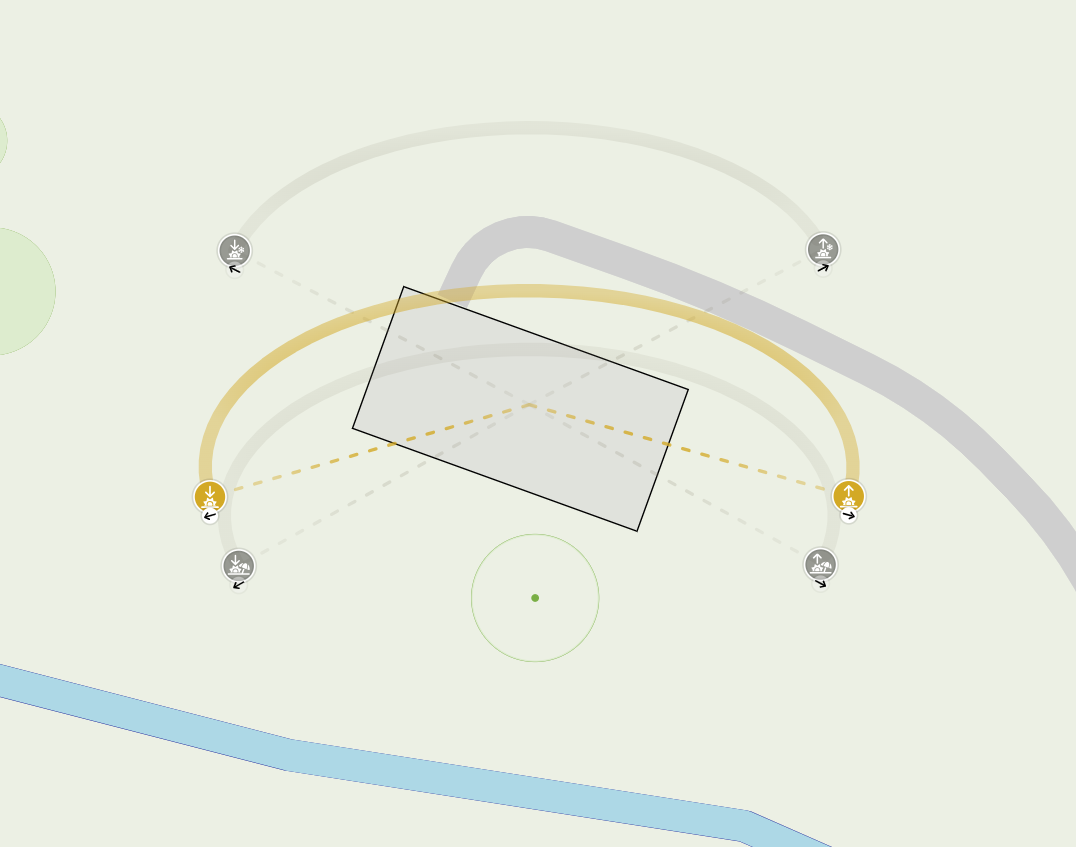
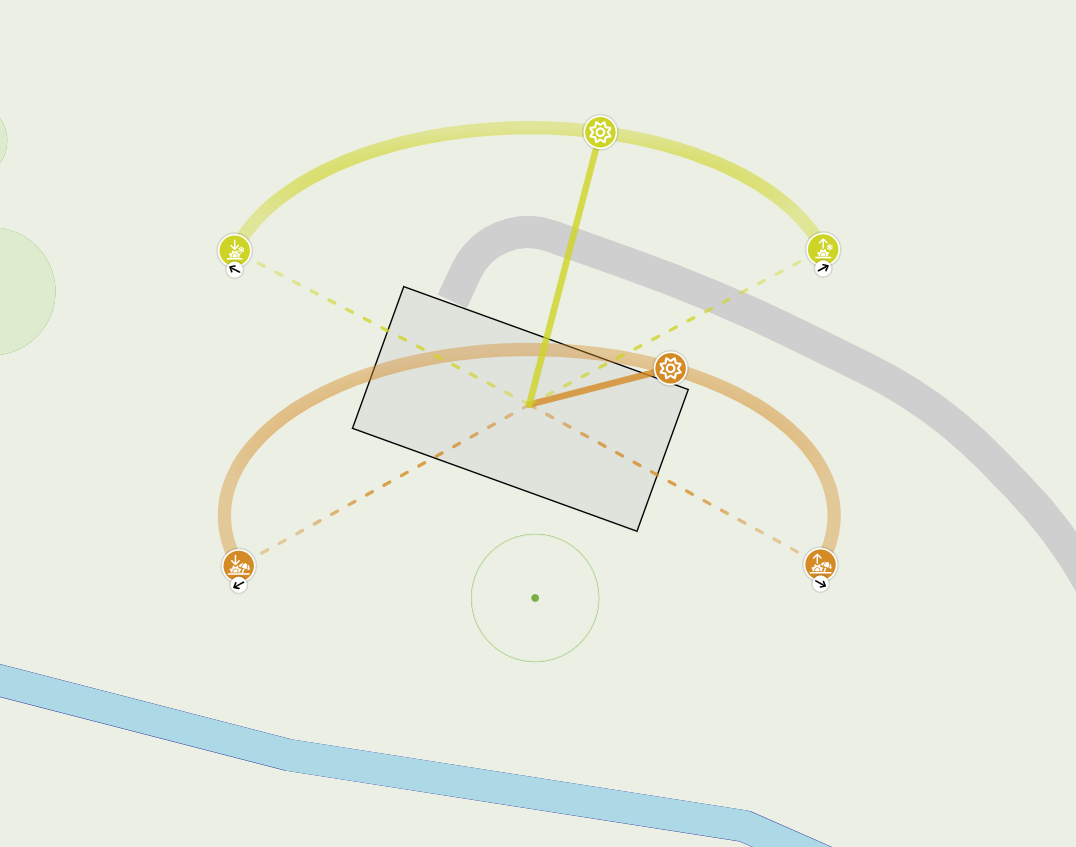
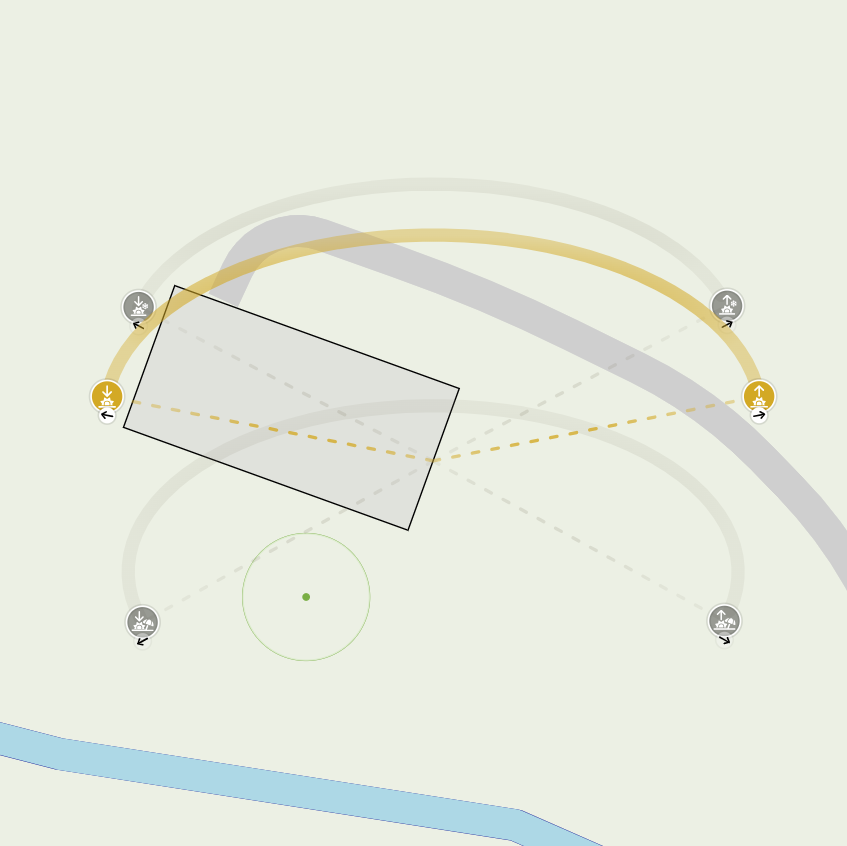
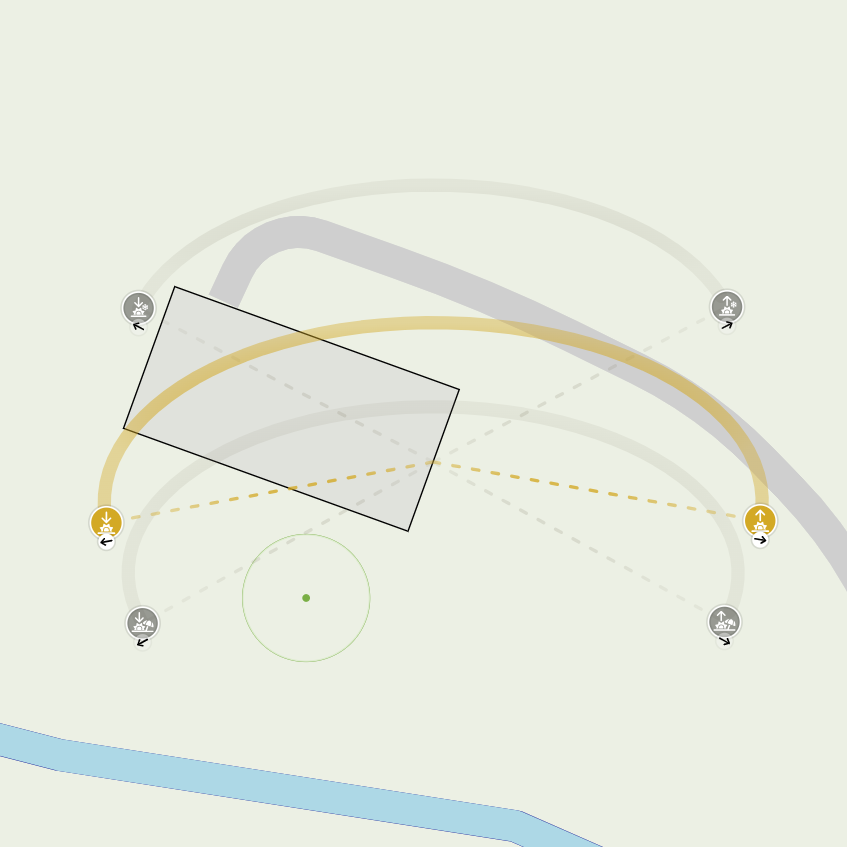
In the illustrations below, we have enabled the sun path for a spring month to investigate the angle of sunrise hitting the side of the house. We can compare this with the summer solstice path underneath, which shows the sunrise angle much further south-east, as well as the winter sunrise angle towards the north-east.
Studying the drawing with climate considerations in mind helps us assess passive solar gain from early morning sun. If we prefer passive cooling during spring and summer, we can make an informed decision to place an evergreen hedge on that side of the house.
Show Sun Tool Time
Toggling the time setting displays the position of the sun at a specific hour of the day. You can then see how the solar direction affects that specific spot on your drawing.
- Click or tap your Sun Tool object to select it.
- Under its attributes, find Hour and change it to the time you wish to investigate.
- Click the Show button next to the attribute to display the sun position at the selected time.
Example of Showing Sun Path at Specific Time of Day
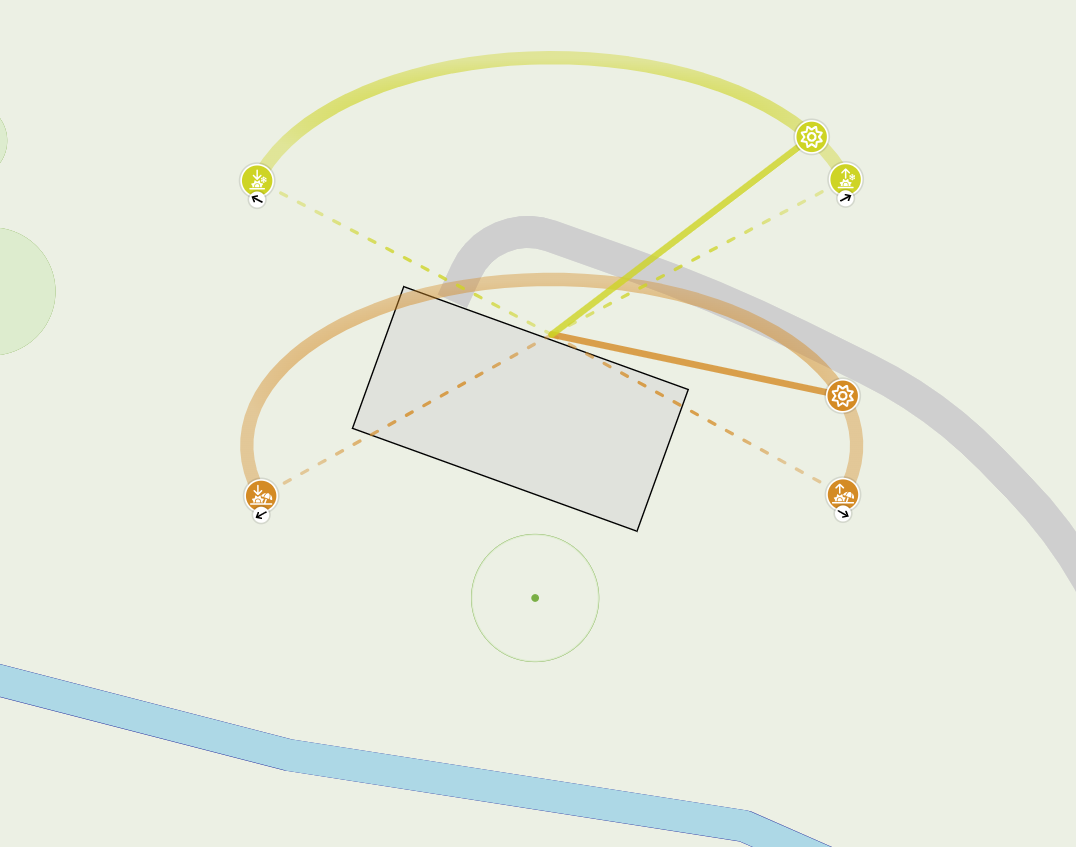
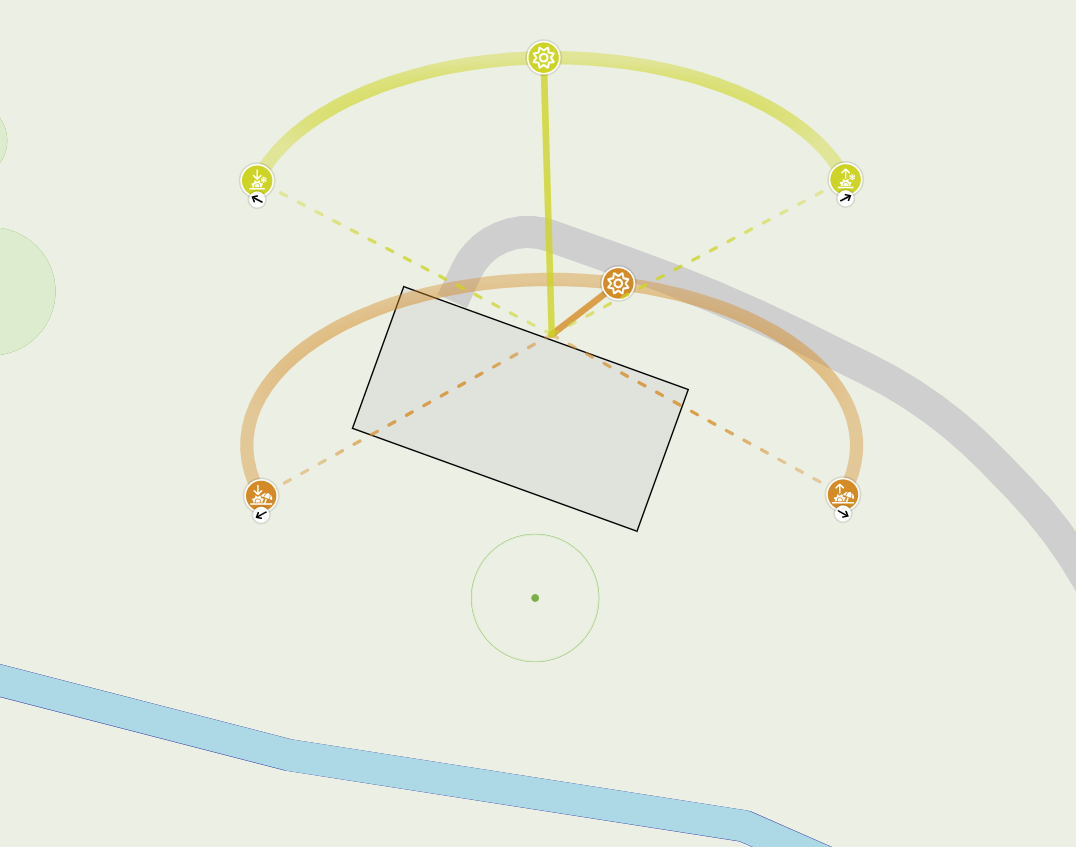
In this example, we want to investigate when sunlight enters the front window of the house to help us choose shade options and their placement. Understanding how sunlight enters the home informs choices between evergreen or deciduous trees, or vines on a pergola.
We position the Sun Tool object over our point of interest, the window seating inside the house where we might enjoy a morning drink. Comparing the sun angles for winter and summer across morning and midday reveals key patterns. In winter, sunlight enters from the north-east, which is similar to the summer sun around noon. We also notice that winter sunrise never reaches as far south-east as summer sunrise.
Depending on context and ground-truthing, we can consider placing two distinct elements: an evergreen shade towards the east and south-east to block early summer sun and prevent excess solar heat gain, and a deciduous or seasonal shade towards the north-east for winter sun and summer shade.
Show Sun Tool Month & Time
Combining both month and time controls lets you pinpoint the exact sun angle for any moment in the year, helping you evaluate seasonal light variations in detail.
- Click or tap your Sun Tool object to select it.
- Under its attributes, find Hour and set it to the time you wish to investigate.
- Set the value of the Month attribute.
- Click the Show button next to both attributes to display the sun position for the selected time and month.
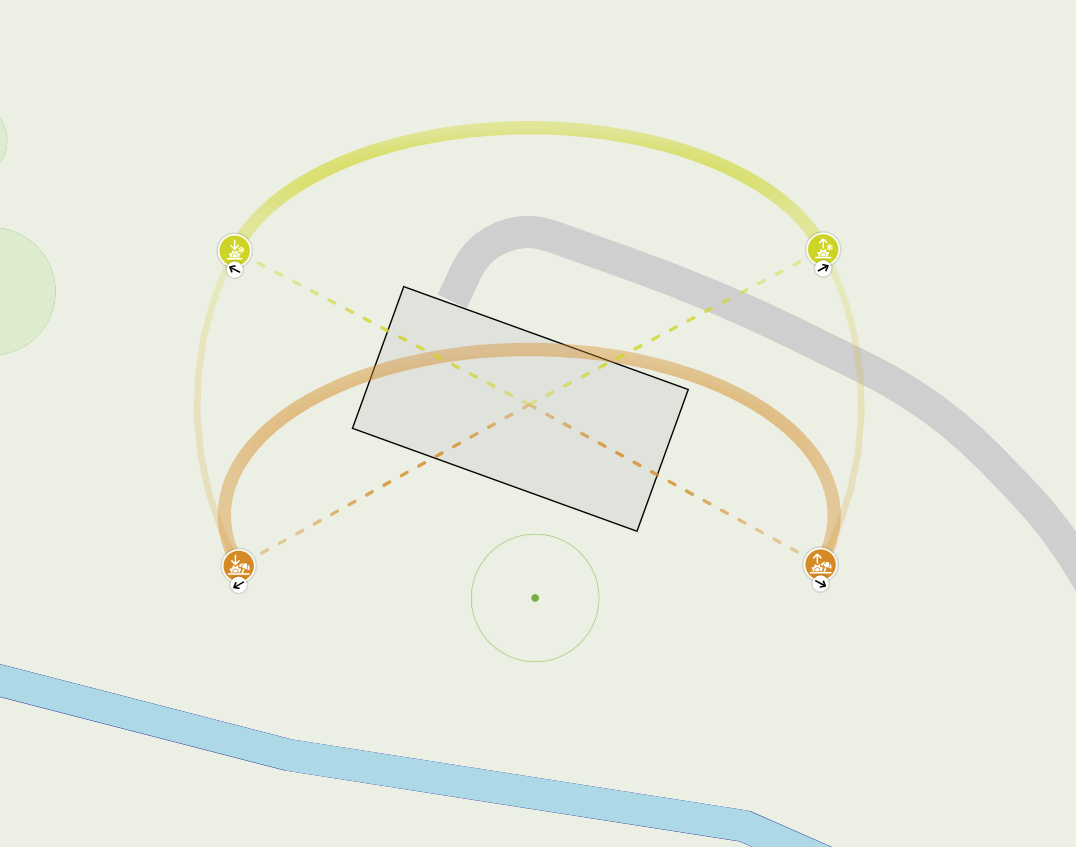
Example of Showing Sun Path at Specific Time of Day and Month
In this example, we want to see how the sun passes over the house to decide on solar panel placement and orientation. Updating the time and month attributes and clicking the Show buttons allows us to visualise the direction of sunlight shining onto the roof. Considering morning electricity usage alongside the sun angle helps us determine the optimal position for the panels.
Step 3: Reuse Sun Tool Settings
Once you have configured a Sun Tool object with accurate location settings, you can copy it across your project rather than setting up new instances from scratch.
Duplicate Sun Tool
To duplicate a configured Sun Tool object, select it on the drawing canvas and click the Duplicate icon. Alternatively, press Ctrl+C and Ctrl+V, or Cmd+C and Cmd+V on your keyboard to create an exact copy with identical location settings, which you can then drag to another spot on your property.
Harness the Sun Exactly Where It Matters
- Drag the Sun Tool over your windows, seating areas, or tree positions to reveal exact seasonal shadows on your Permiehub canvas.
- Start Trial Today