How We: How to Design a Syntropic System on Your Land
Syntropic design mimics natural forest dynamics, relying on regular pruning, rather than brought-in fertilizers, to generate high fertility and yield. In practice, this system is usually planted in rows, pairing productive trees and support species in long parallel lines. Here is how to map and lay out these rows on your own land in four simple steps.
Estimated reading time: 7 minutes
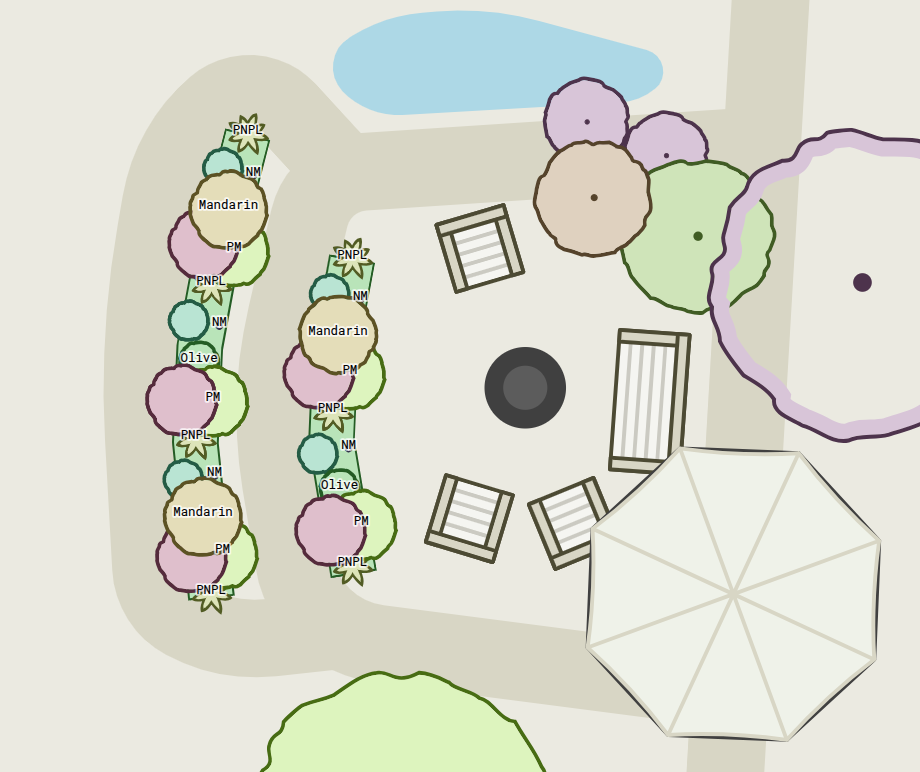
Key Takeaways
- The row is the unit of design. A syntropic system is planned as parallel lines of mixed species.
- Orientation is a decision, not a rule. North–south for even light distribution, on contour for improved water capture.
- Pruning is designed in from day one. Cap productive trees at a comfortable height and give every row a working alley.
Map your land and lay out your first syntropic rows in minutes. Permiehub runs in your browser, and the trial is free.
Start Trial TodayWhat Is Syntropic Farming?
Syntropic farming — also called syntropic agroforestry, and in the research literature successional agroforestry — is an organic agroforestry method developed by Swiss-born farmer and researcher Ernst Götsch in Brazil. It works with ecological succession instead of fighting it: fast-growing pioneer and support species are planted densely beside productive crops, and regular pruning of those support species keeps the system in a state of accumulation, building biomass, soil structure and water retention while it produces food.
Three features appear in every syntropic design:
- Rows. The design unit is a long parallel row. Support species and the productive target share the same row.
- Strata. Species are stacked vertically based on their sun requirements* — emergent, high, medium, and low trees.
- Chop and drop. Support species are cut repeatedly and left where they fall, feeding the soil in place.
* Strata may not always correspond to height — especially at the edges of the system.
The Four-Step Syntropic Design
| Step | What you decide | Permiehub feature |
|---|---|---|
| 1. Read the land | Slope, aspect, water movement, existing trees | Base Map Wizard contours and the Sun Tool |
| 2. Lay out the rows | Orientation, spacing, alleys, row length | Planting Row and Path tools |
| 3. Assign species | Support lines versus productive lines, strata mix | Planting Row presets and strata attributes |
| 4. Plan management | Target height, harvest access, pruning cycles | Plant sizes over time and the Planting Row Sideview |
Step 1: Read the Land Before Drawing a Row
A row drawn on land you have not measured is a guess. Before committing a line, you need the slope, the aspect, where water runs, and what shade the sun actually casts in winter.
Permiehub’s Base Map Wizard imports contour lines for any address in the world, along with water bodies, roads and building outlines. The Sun Tool draws the sun path for a chosen date and time, so winter shade is visible instead of guessed. Site analysis markers then record the things only on-site observations and research can tell you: prevailing wind, wet spots, flood risk, fire risk.
1. Frame your property in the Base Map Wizard. 2. Contours, water and imagery load at real scale.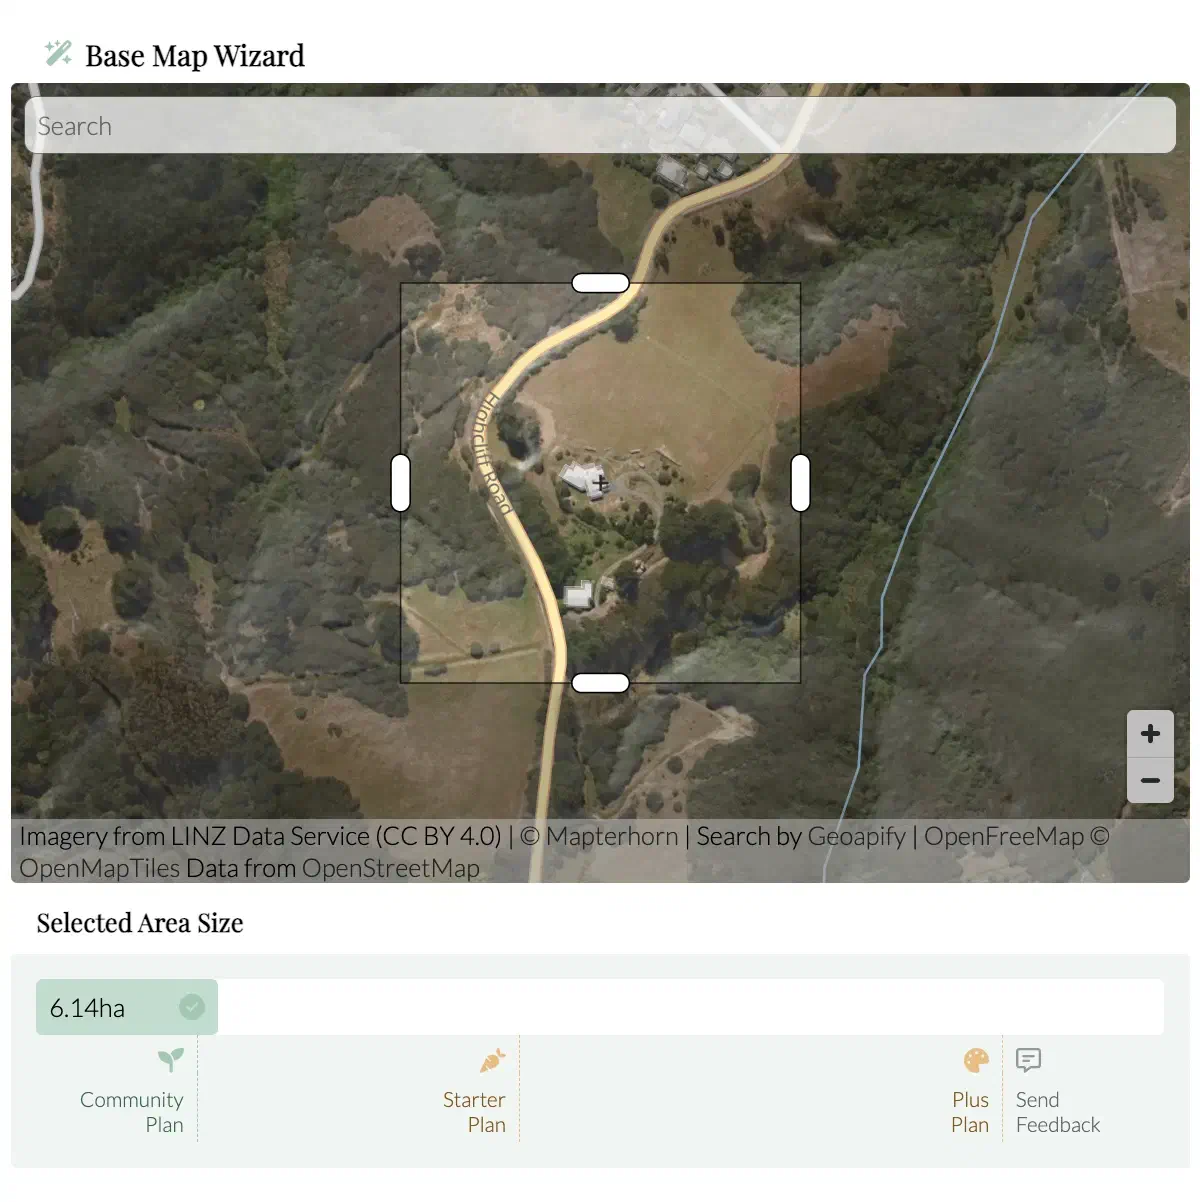
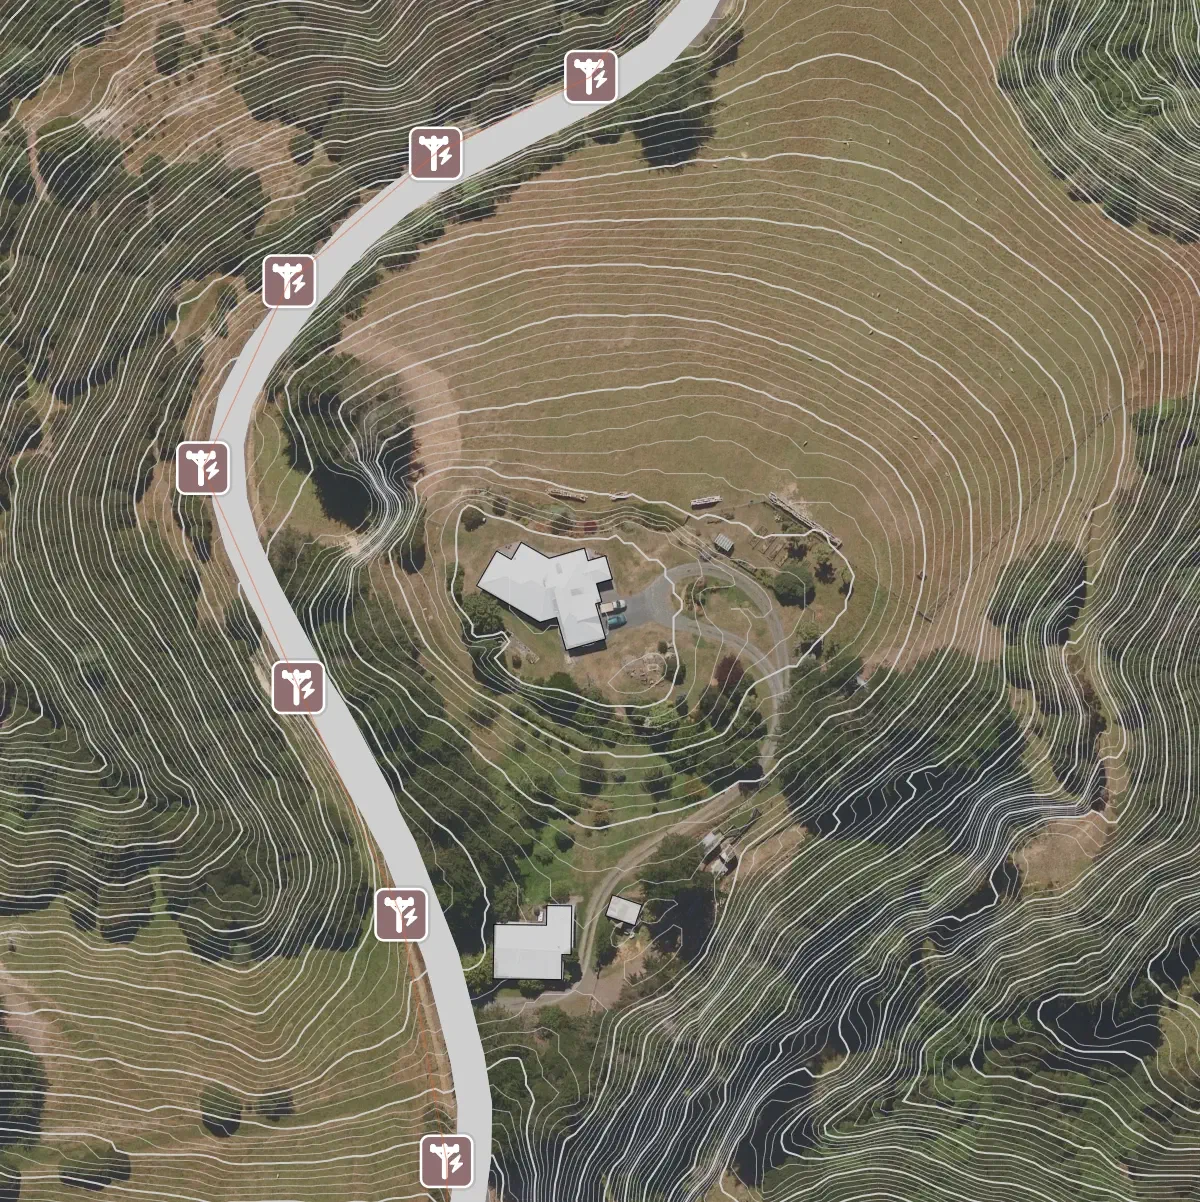
What to look for: the slope too steep to walk with a harvest, the dry ridge, the drainage line, and the trees already on site that will anchor the new rows.
Step 2: Lay Out the Rows and Plan Water at the Same Time
There is no single correct row orientation. Practitioners working in the same climate disagree, because the right answer depends on what is limiting the site.
| Goal | Row orientation | When it fits |
|---|---|---|
| Maximum light into the alley | North–south | The sun passes over the alley for most of the day, so both sides of the row are lit |
| Slow and capture rainfall | On contour | Sloping land, erosion risk, or dry sites where every millimetre counts |
| Retrofit existing orchard | Keep as is | Existing plots and converted orchards |
Draw the rows with the Planting Row tool: click to lay line segments in any orientation or along a contour. Because the row is drawn at real scale, you can compare 4 m against 5 m spacing, read the total row length, and plant count before you order seeds or seedlings.
Syntropic farming row layout drawn over the contours of a real property.
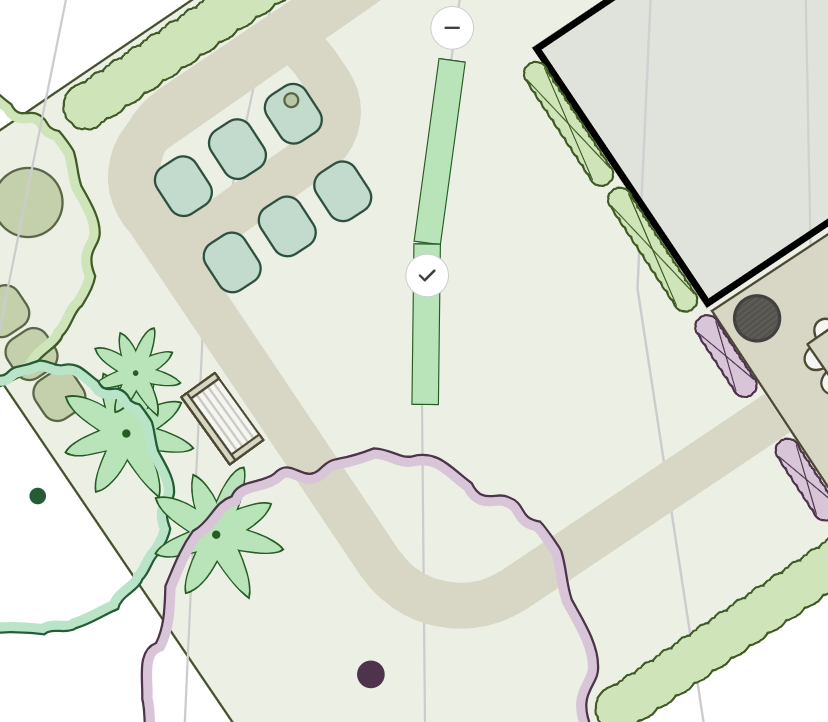
Rows are drawn as line segments, then shaped to the land.
TIP
In addition to publicly available aerial imagery of the site, you can map it with a consumer drone and trace the existing features from up-to-date drone imagery into the base map before designing your site.
Step 3: Assign Species to Each Row
A syntropic row is not a productive tree with a border of filler. It is a deliberate mix, and the mix is the design.
Start from a Planting Row preset — complete or partial syntropic agroforestry row, or biomass planting — then change it to fit your site. Every preset has a repeating module you can resize, and support lines you can add or remove on either side of the target row.
For each plant you set the stratum (emergent, high, medium, low), the spacing, the lifespan, and the size it reaches at different points in time. The Planting Row Sideview shows the same row in cross-section, so the canopy layers and the light they compete for are visible.
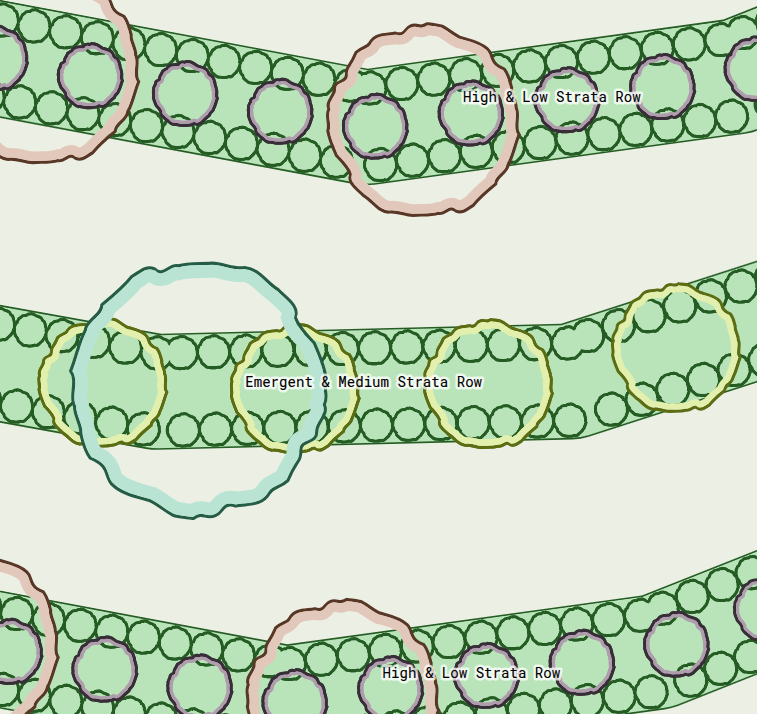
Support and productive lines, selected by stratum.
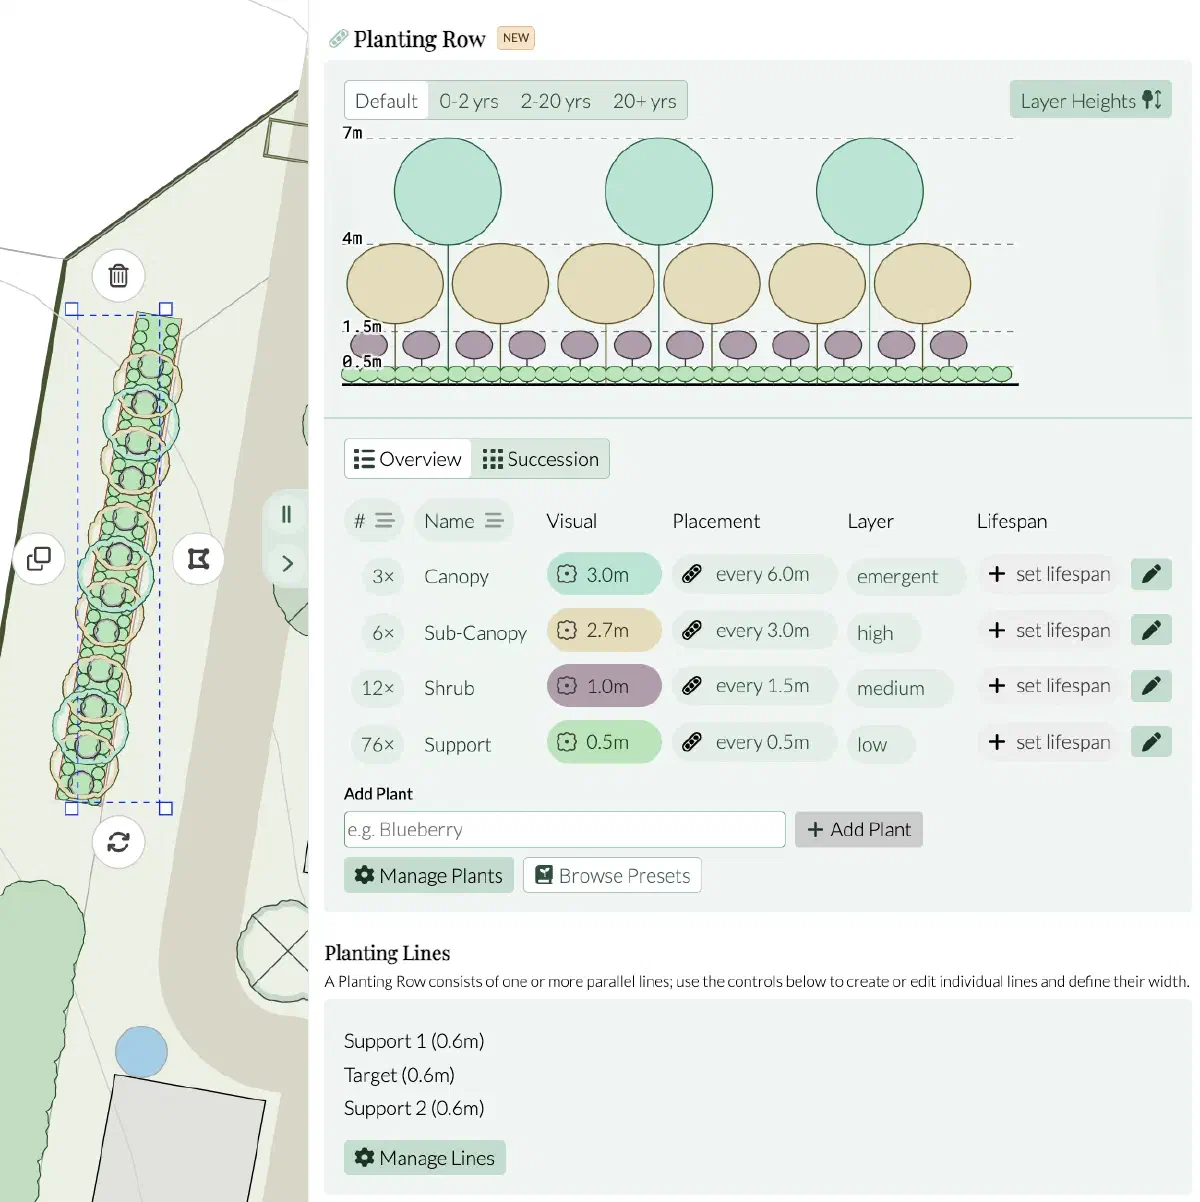
The same row seen in profile, with canopy layers stacked.
Step 4: Plan the Management Before You Plant
Success in syntropic agriculture hinges on pruning. Managing tree canopy height—especially for productive crops like avocados and mangos—is essential to keep harvests manageable and reachable.
Design that height into the drawing. Set the mature size of every productive tree, add the alley between rows, and check the row in Sideview so the harvest can be reached. A row you cannot walk is a row you cannot manage.
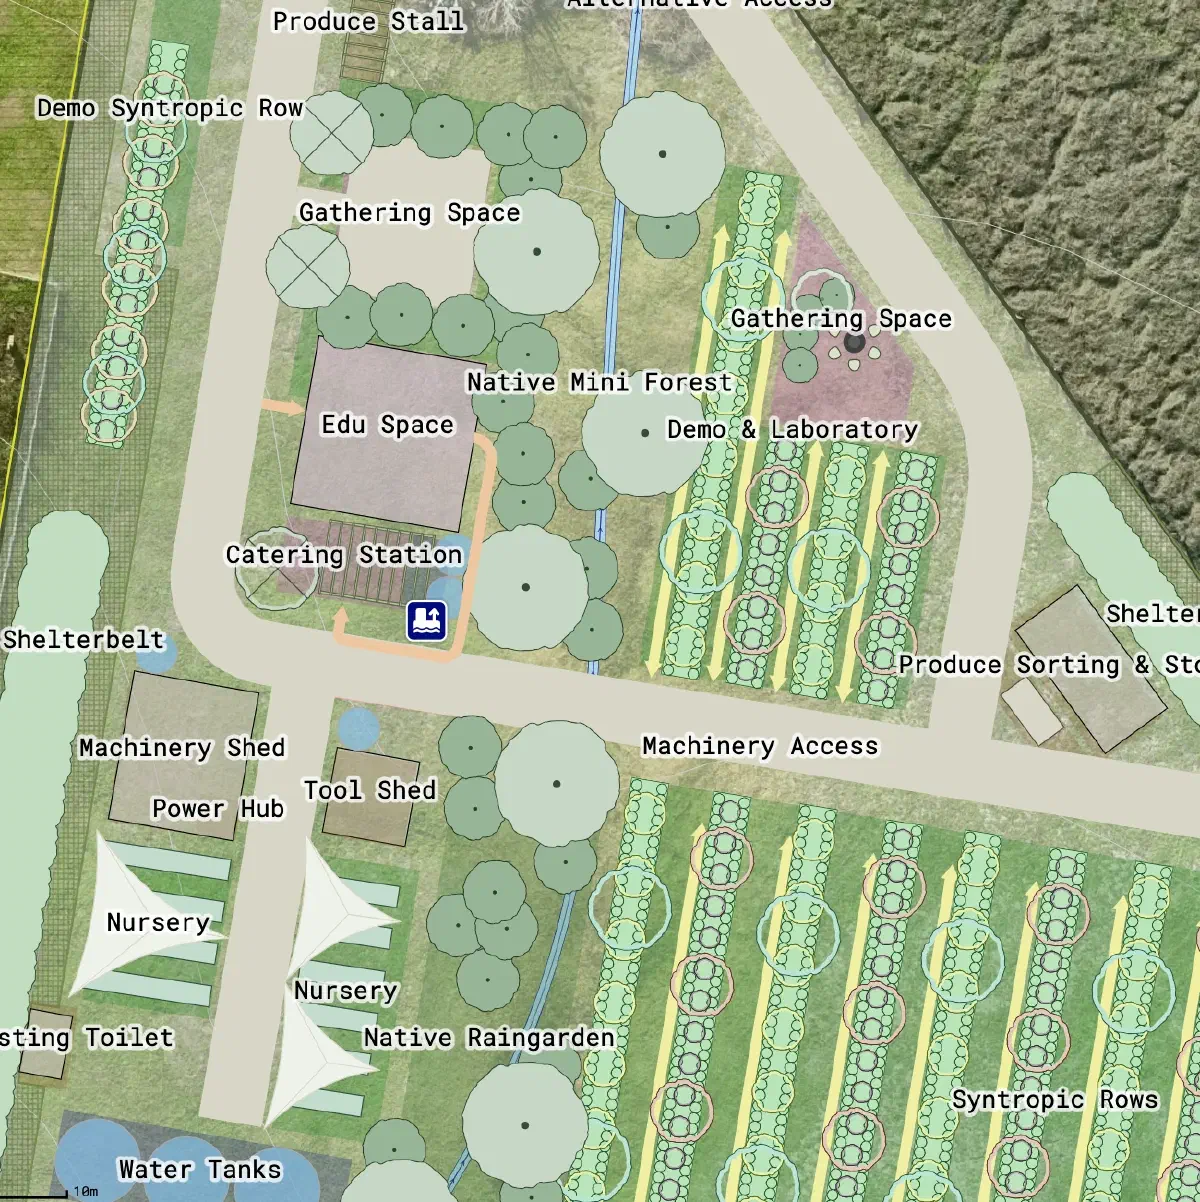
Syntropic system design plan with alternating emergent-medium and high-low planting rows.
Converting Land You Already Have
Many syntropic projects are conversion projects, not clearing. An abandoned olive grove becomes a syntropic system by threading new rows between the standing trees and filling the gaps with support species or more productive species. A conventional orchard is re-shaped by replacing monoculture lines with mixed rows and adding support species where the spacing allows.
In each case the first step is the same: get the contours and the existing vegetation onto a scale-accurate map, then draw the rows over it.
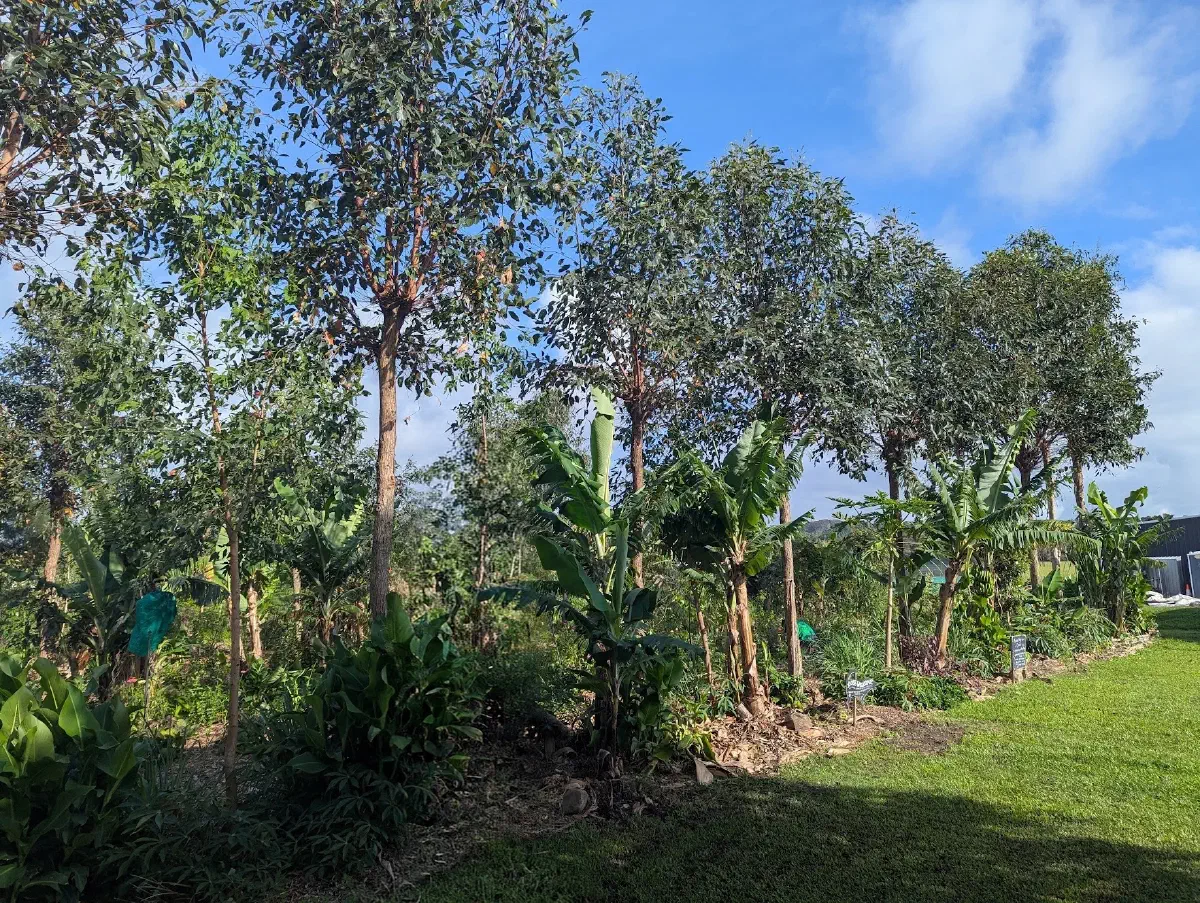
A mature stratified row at The Paddock Project, Mullumbimby, NSW.
Frequently Asked Questions
The placenta is the first, dense planting that establishes a new row: fast-growing pioneers placed around and between the productive species to build biomass, shade the soil and feed the young trees. As the row matures, the placenta is pruned and harvested for chop and drop.
Syntropic farming is a specific method. Permaculture is an overarching design system which covers design process, ethics and zoning across a whole property; syntropic farming is a particular way of growing, developed by Ernst Götsch, built on managing succession and pruning mixed rows. A syntropic plot can sit inside a permaculture design, and the two share the same principles of working with ecological processes.
No. The method was developed in tropical Brazil, but successional agroforestry systems modeled on it have been established in other climates. Practitioners in Spain, Italy, Portugal, Cyprus, Germany, coastal California, semi-arid Mexico and eastern Australia run syntropic rows on as little as 400 mm of annual rainfall. Species, spacing, irrigation and pruning change with the climate; the principles do not.
You do not need a massive amount of land to start a syntropic system, as its core principles of stratification, high-density planting, and biomass management are applicable on any scale. Whether you are working with a few large pots on a balcony, a small urban courtyard, a residential backyard, or a multi-acre commercial farm, syntropic systems can be successfully adapted to fit almost any space.
No, but a scaled map saves time and money. Rows drawn in a notebook are more difficult to measure, so spacing errors may be discovered too late. Permiehub imports the contours and imagery of your actual land, so the row layout, plant counts and alley widths are all real numbers before you place an order.
Draw Your First Syntropic Rows on Your Land
- Stop planning rows in a notebook or generic drawing tool. Import the contours of your property, lay out your planting lines and alleys at real scale, assign species to each row, and see how the canopy will stack over time — all in the browser, no install.
- Start Trial Today